In the realm of web development, keeping abreast of the most current technologies is of utmost importance. If you’ve been delving into web development, you’ve probably encountered Next.js a potent framework for crafting contemporary web applications using React. Within this introductory guide, we’ll immerse ourselves in the realm of Next.js and acquire the fundamentals to commence our journey.
What is Next.js?
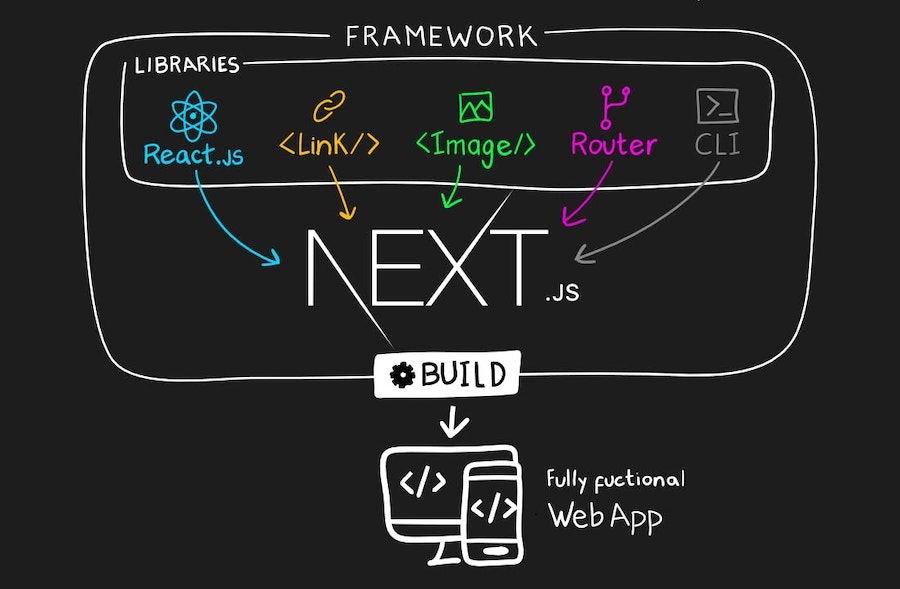
Next.js is a widely embraced open-source React framework, diligently overseen by Vercel. Its primary aim is to streamline the process of constructing web applications, rendering the development workflow more straightforward and efficient.
Next.js offers a comprehensive set of functionalities, including built-in server-side rendering, static site generation, and seamless routing. These features empower developers to effortlessly craft high-performance, search engine-friendly, and easily maintainable web applications.
Prerequisites
Before embarking on your Next.js journey, it’s crucial to possess a foundational understanding of web development basics. Prior familiarity with HTML, CSS, JavaScript, and React is necessary. If you’re new to these technologies, we recommend dedicating some time to learning them before delving into Next.js.
Setting Up a Next.js Project
Begin the process of setting up a basic Next.js project by following these steps. Ensure that you have Node.js and npm (Node Package Manager) installed on your computer before proceeding:
Initiating a New Next.js Project
Start by launching your terminal and executing the following command to establish a fresh Next.js project:
(npx create-next-app my-next-app)Replace “my-next-app” with your desired project name. This command will configure a brand new Next.js project within a directory named as per your input.
Navigate to Your Project
Once the project is created, navigate to the project folder using the cd command:
(cd my-next-app)Start the Development Server
To start the development server, run the following command:
(npm run dev)This will start a local development server, and you’ll see output in your terminal indicating that the server is running.
Open Your Application
Open your web browser and navigate to http://localhost:3000. You’ll see your Next.js application up and running.
Understanding the Project Structure in Next.js
- Next.js provides a structured and organized project layout to simplify code management. Below is a concise overview of the key directories and files within a typical Next.js project:
- pages/: This directory is the core of your application and holds its pages. Each JavaScript or TypeScript file within this folder corresponds to a specific route in your application. Next.js automatically generates routes based on the files in this directory.
- public/: Here, you can store static assets such as images, fonts, and other files that need to be accessible directly from the browser. These files can be referenced in your code using relative paths.
- components/: The components directory is where you can house your reusable React components. Organizing your UI elements and functionality into components promotes code modularity and maintainability.
- styles/: Next.js uses CSS modules as the default styling approach. You can place your CSS or SCSS files in this directory. CSS modules allow you to scope styles to specific components, preventing global styling conflicts.
- api/: This directory is designed for serverless functions, offering a powerful way to create serverless APIs. You can define serverless endpoints and API routes in this folder, making it easier to implement backend functionality within your Next.js application.
Creating Your First Page
Let’s create your first page in Next.js. In the pages/ folder, create a new file named index.js (or index.tsx if you prefer TypeScript). Here’s an example of a simple Next.js page:
(// pages/index.js
import React from 'react';

function HomePage() {
  return (
    <div>
      <h1>Welcome to My Next.js App</h1>
      <p>This is a simple Next.js application.</p>
    </div>
  );
}
export default HomePage;)
Save the file, and when you navigate to http://localhost:3000, you’ll see your newly created page.
Routing in Next.js
One of the standout features of Next.js is its built-in routing system. You don’t need to set up any additional routing libraries. To create a new page, simply create a new file in the pages/ folder with the desired route structure. For example, if you create a file named about.js, it will be accessible at http://localhost:3000/about.
Conclusion
Next.js stands as an invaluable framework within the realm of contemporary web development. It empowers you to harness the full potential of React while delivering additional advantages, including server-side rendering, static site generation, and efficient routing. As you embark on your journey to master Next.js, you will quickly realize its indispensable role in your web development toolkit.
So, if you’re looking to take your Next.js project to the next level, don’t hesitate to hire Next.js developers who can leverage their expertise to bring your web application to life. Their specialized expertise will breathe life into your web application. With the right team at your side, you’ll be well-prepared to craft web experiences characterized by speed, reliability, and user-friendliness qualities that set you apart in today’s fiercely competitive online landscape. Happy coding and successful hiring!